Getting Started with WinCC OA
It is possible for users to run WinCC OA using the application tool. There are many tools made available in WinCC OA for administration, configuration, editing, archiving etc. In general WinCC OA is a tool for building SCADA applications.
WinCC OA has the capability of device description, access control, alarm handling and display, filtering, logging, summarizing, trending, archiving and UI building etc.
WinCC OA does not have specific tools for abstract behaviour modelling (Finite State Machines) or automation and error recovery (Expert Systems).
WinCC OA Project Administrator (PA)
Clicking on the WinCC OA application tool will lead the user to the 'Project Administrator' panel. The panel displays current projects installed in the system, their versions and the process monitoring status.
Project Administrator Panel
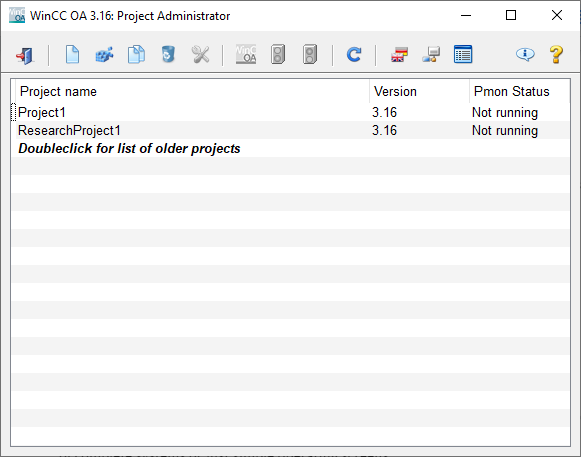
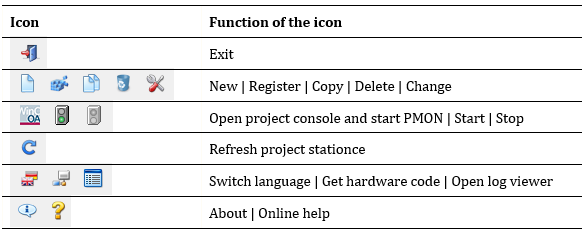
Header Section
Multiple projects can be administered in 1 machine but only 1 project can be started at a given instance. Projects are runnable and used alongside multiple supporting interfaces, scripts, etc.
WinCC OA Systems
There are 4 main types of systems associated with WinCC OA.
Creating a WinCC OA Project
The 'Project Administrator' panel is used to create projects. The following steps are to create a distributed project using the PA panel.
In WinCC 'Distributed Systems', each system name and system number must be unique. User must ensure that this factor is satified whilst creating a project for such systems.
-
Click on the "New Project" icon in the header section of the PA.

-
Select the required type of the project in the 'Project Type Settings' section of the 'New Project' popup window and click the "Next >" button.
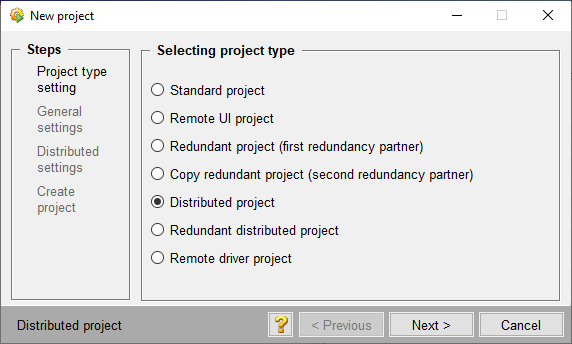
In the case of the example, selected type is "Distributed Project" and once the user clicked on the "Next >" button, the 'Project Type Settings' section will have a tick indicating the completion
-
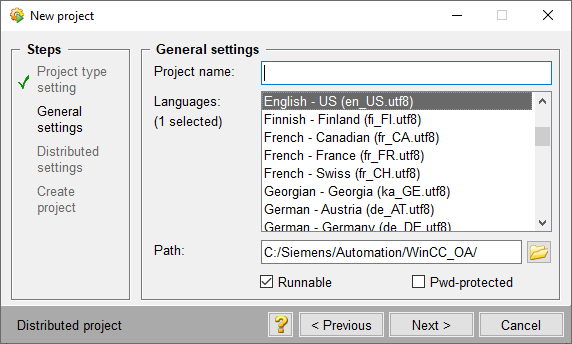
Provide a name for the project being created, select a language and provide the path to the exxpected destination of the project in the 'General Settings' section and click the "Next >" button.
-
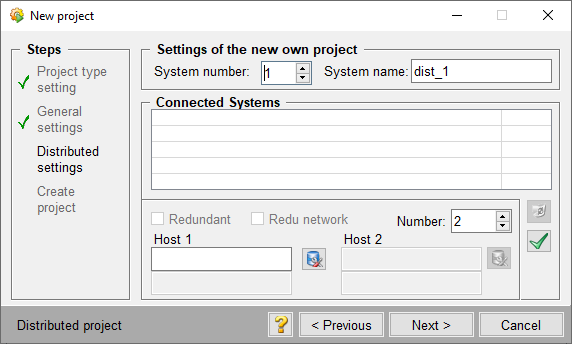
Fill in the information on system name and number in the 'Distributed Settings' section and click the "Next >" button.
-
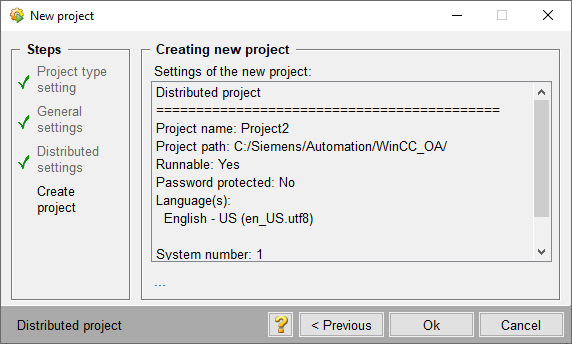
In the final stage, a summary of the settings could be seen and double check to confirm the accuracy. Click on "OK" to create the project.
After a moment the newly created project will appear in the 'Project Administrator' panel under the list of projects in the system
WinCC OA Console
The WinCC OA Console provides the user with project manager information and is used for starting, monitoring and stopping project managers.
Selecting a project and then clicking on the "Start Project" icon (A) leads to the console automatically. If not click on the "Open Project Console and Start PMON" icon (B).

Process Monitor or the PMON handles starting, configuring, stopping and monitoring project managers.
Console

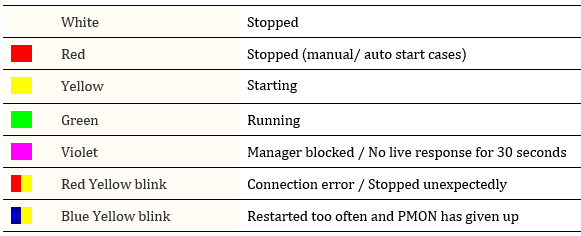
Color Code
In the monitoring panel each color has a meaning based upon the status of the respective project manager type.
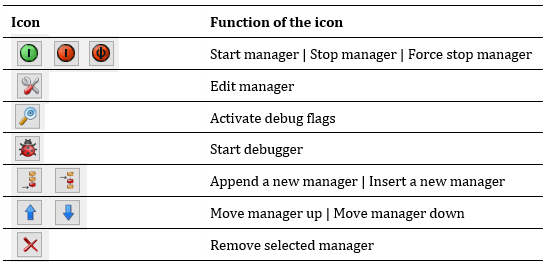
There are 3 sections in the console of WinCC OA.
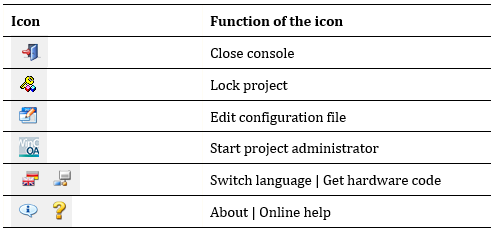
Header section : General tools
Project section : Project specific tools
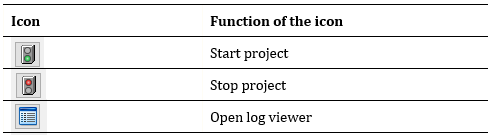
Manager section : Project monitoring tools
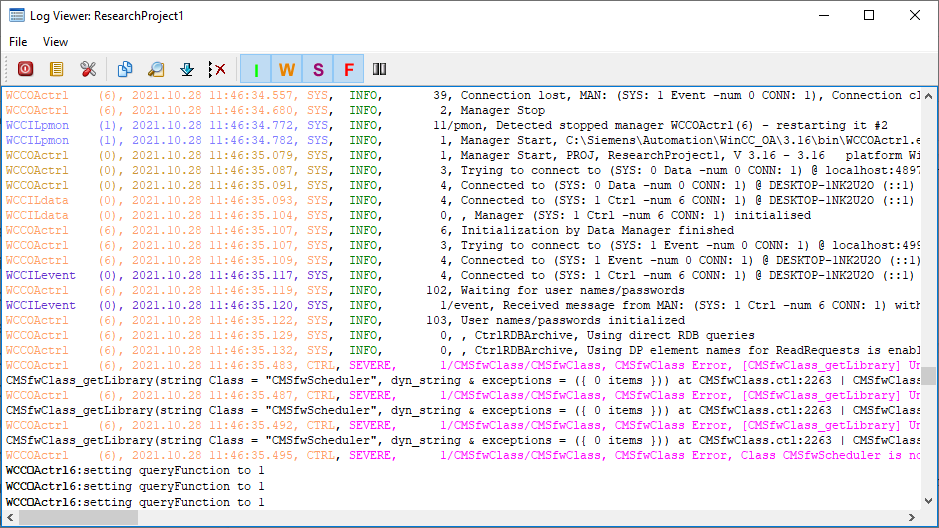
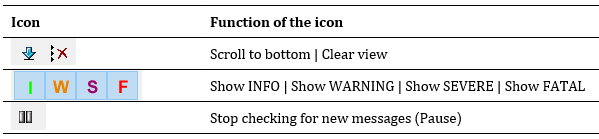
WinCC OA Log Viewer
The Log Viewer is the output unit for system information of processing managers and therefore is recommended for the system experts and administrators.
The Log Viewer window automatically pops up when a project is started. If it is not, users can click on the "Log Viewer" icon to open the Log Viewer window.
Log Viewer Window
There are 2 tabs in the menu bar and tools in each of these menus are included in the tool bar of the Log Viewer window.
File menu
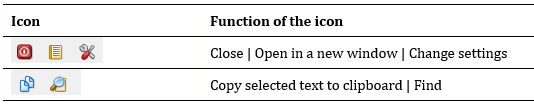
View menu
WinCC OA Graphical Editor (GEDI)
The Graphical Editor commonly referred to as GEDI is used for creating and editing panels. It provides tools for creating and configuring graphic objects which can be graphical representations of complete systems or just simple operating screens.
Graphical Editor Panel
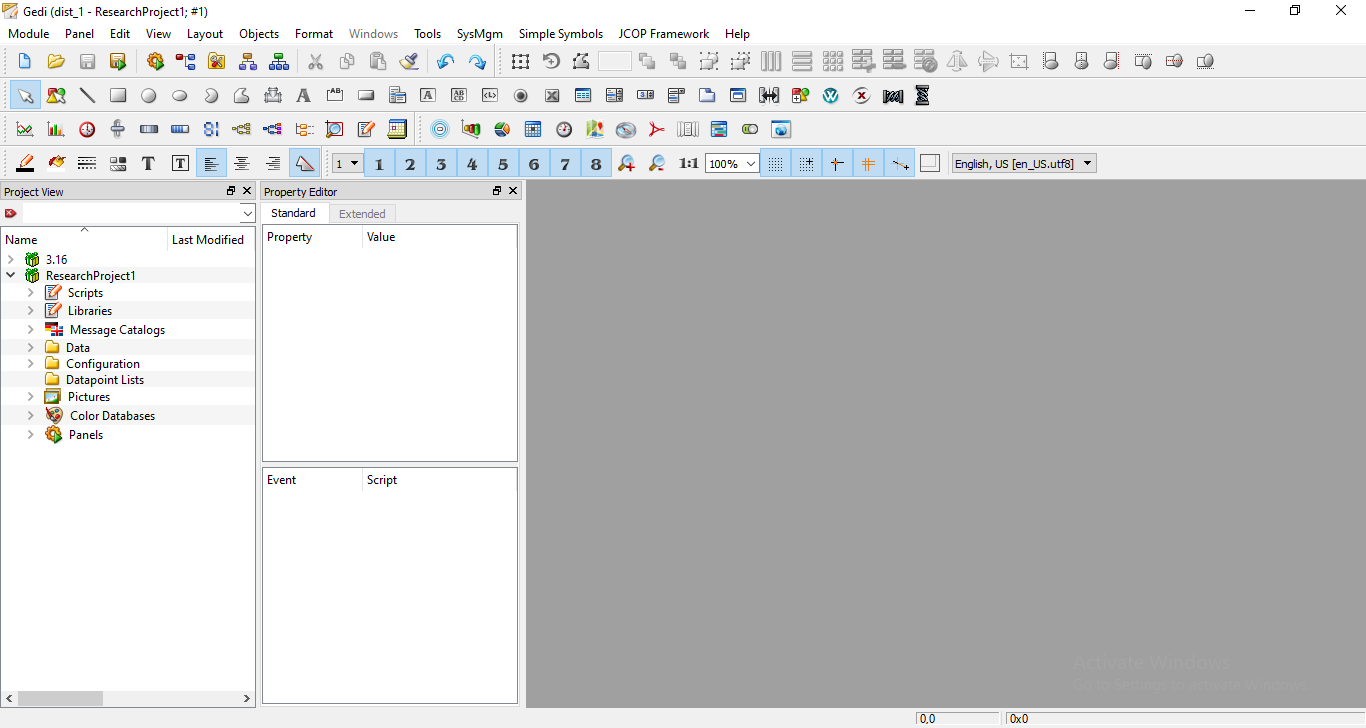
WinCC OA GEDI has multiple sections, menus and toolbars designed for different tasks and different panels to view libraries, current properties, etc.
Menu Bar
The Menu Bar of GEDI consists of the above tabs each having a dropdown menu of all options available for the selected menu.

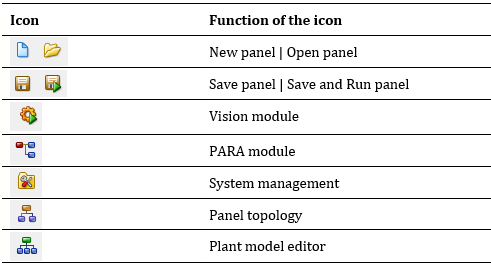
Tool Bars
Tool Bars of GEDI consists of the many icons each having a different purpose in designing grphical objects. These icon present shortcuts for the tools as all of these are options available in dropdown menus of the Menu Bar.

Main Tools (2) :
- The Main Tools toolbar displays by default and includes standard functions available in Panel and Edit menus.
I. Basic tools
II. Editing tools
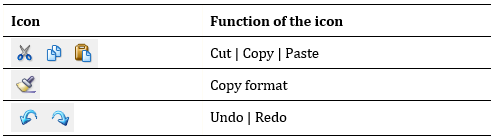
III. Layout tools

Basic Objects Toolbar (3) :
- Users can create basic graphic objects by employing tools available in the Basic Objects toolbar.
Extended Objects Toolbar (4) :
- Users can create extended graphics objects employing the tools available in the Extended Objects icon bar.
Format Tools (5) :
- Users can format objects employing the tools available in the Format Tools icon bar.
EWOs Tools (6) :
- Extended Widget Objects allow the user to embed externally designed objects.
View Tools (7) :
- Users can set the view of the panel window employing the tools available in the View Tools icon bar.
Project View
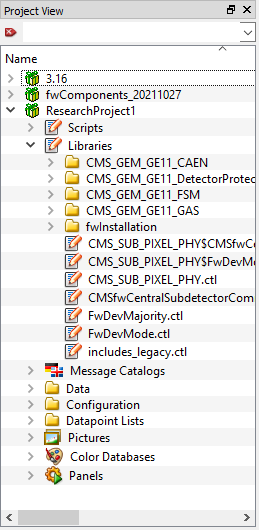
"Project View" tab provides information on,
- Panels
- Scripts
- Libraries
- Message catalogues
- Pictures of current projects
- Embedded subprojects
- WinCC OA installation directory
Property Editor
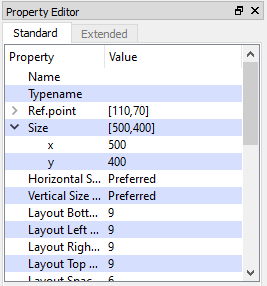
The Property Editor is employed to edit object properties of graphic objects created in a panel. It has 2 tabs,
- Standard : General object properties are available (color, size, position etc.)
- Extended : Object specific properties (word wrap, scroll bar modes etc.)