Configuring Detector Protection Settings
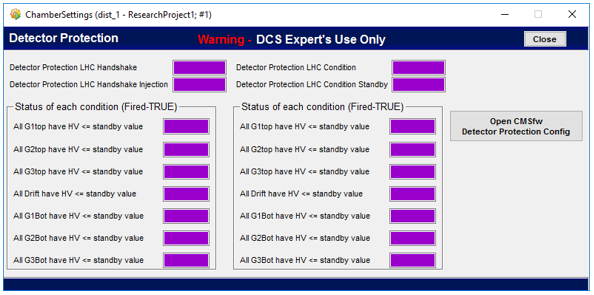
Detector Protection Panel
Detector protection settings are associated with the 5 buttons with the sam expectation on the main interface. This panel focuses on 'LHC Handshake' and 'LHC Condition' specifically.
The expert panel to enable and disable configurations can be accessed by clicking on the "Open CMSfw Detector Protection Config" button.
It is up to the expert to remember to re-enable the configuration after the intervention (and restart the manager) because no automatic check is performed on disabled configurations (and this could have safety consequences).
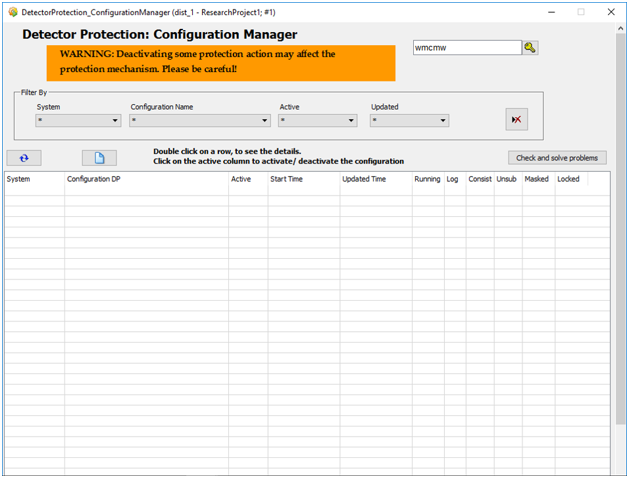
By default if there is a configuration in the local system, only the local configurations are shown. Otherwise all the configurations in remote systems are shown.
Enabling a Configuration
- If one of the input conditions is triggered, the corresponding protected action would be performed and after verification the subdetector will respond to central system which is waiting to proceed.
- Subscription is automatic.
Disabling a Configuration
- No matter if input conditions are triggered, protected actions would not be applied.
- Apart from disabling the configuration, it should also be explicitely UNSUBSCRIBED because unsusbscription is not automatic and central system keeps waiting for the answer of the subdetector even on disabled configurations.
Configuring Detector Protection
Detector Protection Configuration panel can also be accessed by clicking on the 'CMSfwDetectorProtection / Configuration' option of the 'Device Editor and Navigator' panel.
-
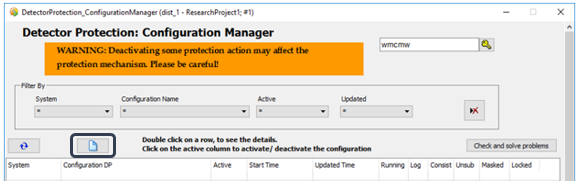
Click on the icon indicated below available in the Detector Protection : Configuration Manager.
-
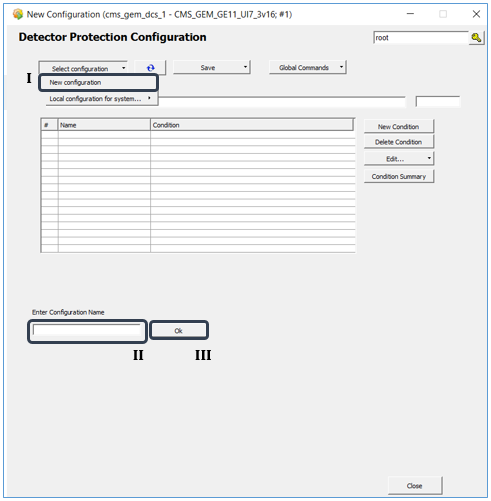
Select the 'New Configuration' option (I) from the 'Select Configuration' menu in the popup panel, provide a meaningful name in the 'Enter Configuration Name' field (II) and click the "Ok" button (III).
-
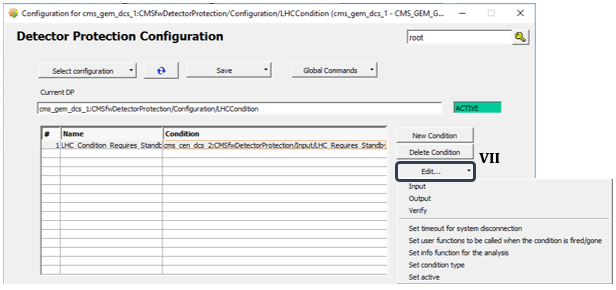
Click on the "New Condition" button (IV), provide a name in the 'Enter Condition Name' field (V) and click the "Ok" button (VI) to create a new condition.

-
In order to create an input, click on the "Edit" button (VII) and select the option 'Input' from the dropdown menu.
-
Fill in the fields with necessary information for the input being created.
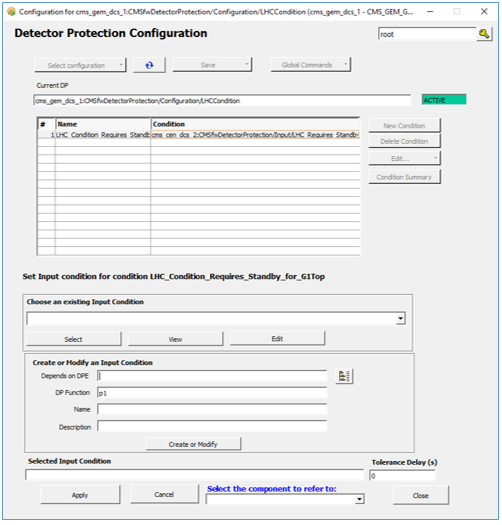
The user can select an existing input condition if preferred or simply fill in the fields in the 'Create or Modify Input Condition' section.
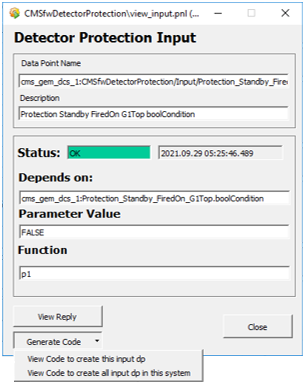
Once the "Create or Modify" button is clicked after filling in the information, the user will be able to see the created input by using the PARA Module.
-
Select a component from the 'Select a Component to Refer to' menu and view the code to ensure if all applications are in order by clicking on the 'Generate the Code' menu in the popup panel before confirmation.
-
For further modifications or viewing purposes, use the PARA Module.